Video: KB Clean & Jerk
The Kettlebell Clean and Jerk
What is it? An easier to learn and more forgiving variation of the classic barbell clean and jerk.
Why I like it: Primarily as a great variation of a CNS primer. Drop in a few sets of 3-5 repetitions per arm before hitting the core movement for the day's training session. By the time you work your way through your warm-up and this primer and arrive at the main movement, you'll feel great and be ready to go!
Got any technique tips? Of course I do: The first portion of this movement begins as a KB Swing, but you should only take the swing up to waist level (not shoulder/eye level). From there rotate your catch arm through an upper-cut style movement pattern to then "catch" the kettlebell. Be conscious of moving your arm around the KB as this will soften the impact of the "bell" against your forearm. From here, explosively push your body away from the bell as you accelerate it overhead.
Kelsey took my post idea for the Turkish Get-up yesterday, so I had to switch it up. Did anyone notice Steve and I literally answered the same question twice last week? Clearly, I didn't read his Monday post... trying not to do that two-weeks in a row!
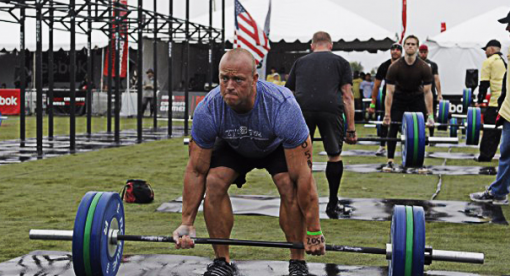
Straight Bar vs. Trap Bar Deadlifts, Part 1
 Which bar is more appropriate for your deadlift training goals?
“What’s your thought/preference on straight bar deadlifts vs. trap bar deadlifts?”
I hear this question constantly, but because both lifts closely resemble one another, and because both lifts are used so often, I can understand why it can be a confusing topic.
So, what exactly are the differences? Which of the two bars is easier to learn? Which variation will add more muscle mass? Which option will be place less stress on the low back? Which variation will provide a greater stimulus for the hips? Which bar would Wolverine and Batman choose, respectively? Hang tight, as I’m about to answer those questions and then some.
Continue Reading....
(Note: The above link takes you to my most recent OneResult article)
(Note to guy in above picture: Pack your neck FOR THE LOVE!!!)
SAPT Exercise of the Week: Goblet Squat to Stepback Lunge
Here's a cool hybrid exercise that will work your lower body and smoke your core as well.
Goblet Squat to Stepback Lunge
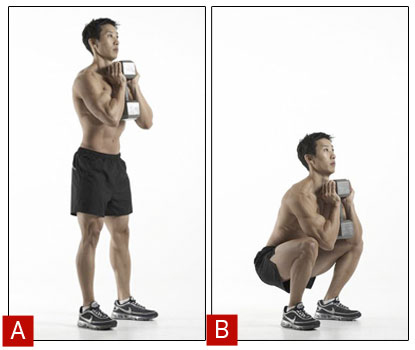
How to do it: Pretty self-explanatory. Grab one or two kettlebells and hold them in the goblet or "racked" position as shown in the video. If you don't have kettlebells, hold one dumbbell at your chest as shown in the picture below.
One squat followed by a stepback lunge with each leg equals one rep. Perform 5-12 reps, depending on your goals.
 Why I like it: I find this exercise to be useful for a few scenarios:
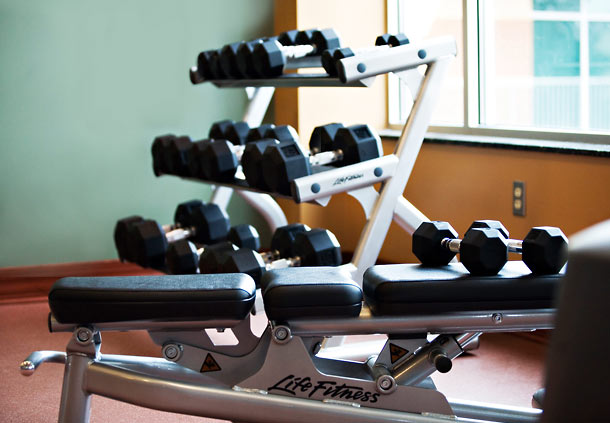
1) Travel. It's no surprise to most of you reading that hotels aren't the best-equipped when it comes to their "fitness rooms." The first thing you'll notice is the lack of a squat rack (which would cost less than the myriad machines they have, along with providing countless more uses, but I digress). You'll then quickly notice a bunch of treadmills, machines, and, if you're lucky, a dumbbell rack.
 However, more often than not, the dumbbells stop at 50lbs. This is all well and good....I get why they do that. Nonetheless, sometimes those who are a bit stronger run out of ideas with what to do with sub-55lb dumbbells besides doing thirty reps of everything. Since the goblet squat to stepback lunge demands more from you than performing a squat (or stepback lunge) on its own, you can get more out of the lighter dumbbells. Also, with the weight being held at your chest, your entire midsection is going to have work like crazy to keep yourself upright.
Another note here would be if you're in a normal gym with only a few minutes to train and the squat rack is being hogged by a dude doing shrugs for an hour.
2. To use on an "off" day. The more I train, the more I tangibly recognize the truth of Dan Gable's sage advice: "If something is important, do it every day."
Wanna know something that's important? Squatting! Toss in a few of these babies on your off days to get some bloodflow going, "unglue" yourself after a long day at the office, and ingrain some proper motor patterns.
Not to mention, the stepback lunge is the most "knee friendly" of all the lunge variations, on top of the fact that it doesn't typically invoke too much post-workout soreness due to lessened deceleration demands (as you'd experience during a forward lunge or walking lunge).
If you are using these on an off day, go light with the weight selection. No need to be a superhero, big guy.
3. Accessory Work. We've also programmed these for people as part of their main training day, for a few reasons. Maybe we're trying to give their CNS a break from the barbell (ex. if they're overwhelmed with in-season demands or are doing a lot of extra work outside SAPT with the military, their sports teams, etc.). Or, sometimes, we're just trying to deload their spine a bit and take some time away from barbell squatting/lunging. Or, maybe we just want to make them hate life.
4. Conditioning Work. As noted above, these things have the potential to make you hate life. Toss them in from time to time to develop that good ol' work capacity.
**Addendum: This also makes a great variation for sandbag work. See the video below in which me and a few buddies of mine did these for part of an outdoor workout.
Excellent Strategy for Upper Back Development
 I really don't think there's a such thing as "too much upper back work." In fact, I'd go so far to say that undergoing a training plan (be it athletic performance training, running, bodybuilding, etc.) without paying special heed to the portion of your torso that you don't see in the mirror is akin to constructing a house on a foundation of sand.
Keeping it brief, here's a simple, truncated list of what upper back work can do for you:
- Improve posture
- Augment your "big lift" training (upper back weakness is often a limiting factor in how much you can deadlift, squat/front squat, and bench press)
- Ward off shoulder issues
- Offset all the slouching we do on a daily basis
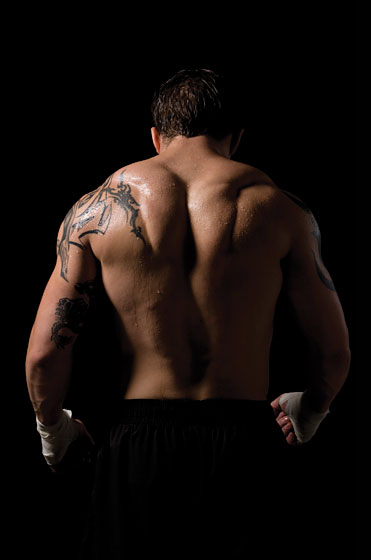
And, perhaps what most of the majority of the crowd cares about: Enhancing one's aesthetic. For the ladies in the crowd, nothing exudes more confidence than standing "tall" with the shoulders pulled back. For the men the crowd - with some added assistance from farmers carries - you can at least come close to emulating Tommy Conlon's trap/upper back development which totally PWNED in the movie Warrior (see picture on the left).
Yeah, exactly.
Alright, let's get to it. Here's an awesome strategy to give your upper back some much-needed attention:
Pair a bilateral 'pull' with a unilateral 'push,' and double the number of sets for the pulling exercise.
As soon as I heard this strategy from Eric Cressey I knew it was brilliant, and, upon implementing it in my own training, I wasn't disappointed.
What does it look like?
Pick a bilateral, horizontal pulling exercise (chest-supported row, barbell row, TRX row, cable row, etc.) and pair it with a unilateral pushing exercise (single-arm dumbbell press, single-arm overhead press, single-arm pushup, etc.). I recommend putting this pairing first during an upper body day, so the first two exercises would look something like this:
A1. Seated Cable Row, Pronated Grip
A2. SA DB Bench Press, Neutral Grip
HOWEVER, here's the kicker.....set up the set-rep scheme something like this:
A1. Seated Cable Row, Pronated Grip: 6x8 A2. SA DB Bench Press, Neutral Grip: 3x6/side
THEN, sequence the movements as follows: Seated Row --> SA Bench (left side) --> Seated Row --> SA Bench (right side) --> Seated Row --> SA Bench (left side) --> etc. etc. etc. clap yo' hands, fist pump x1,000.
I've been using this with enormous success for the past eight weeks or so in my own training. Why is this so awesome?
1. It's an easy way to keep your pulling vs. pushing volume in check. Most All of us tend to favor pressing over pulling, so setting up the sets/reps like this forces us to remain honest.
2. It's a fantastic way of getting in a lot of good horizontal pulling without feeling too fatigued. Since you essentially take a "mini break" between each set of rows to do your pressing exercise, it activates the antagonists of the back musculature, leaving you feeling a bit more rested by the time you get back to the row.
3. You're still providing plenty stimuli for the pressing muscles via the single-arm variation. Not to mention, the single-arm pressing exercise is an excellent method of receiving the added benefit of core stability training. Your have to brace your abs and glutes HARD to keep your torso from shifting side to side. (Note: If you're wondering why I have my arm out to the side like an idiot in the video, it's 'cuz I'm trying to counterbalance. Don't knock it till you try it....geeze....)
4. It just flows well. You can knock out this pairing in relatively little time while still getting a lot of work accomplished.
To put things in perspective, let's say you just do this during one of your upper body days for two, 4-week training blocks. Assuming you keep all your other pull/push pairings of equal volume (which I wouldn't...but let's just go with it...), that gives you an extra 240 reps of pulling over a mere 8-week period! Just by making that simple adjustment in your programming.
Even if you go with a "6x6" set-rep scheme for the bilateral pull, that still gives you 144 more repetitions of pulling over pushing, and we're talking only two months out of the year.
As long as you keep up with your deadlifts and other cornerstone lifts for the backside, imagine what will happen if you cycled this in and out of your training year round?
Press Around the Pain
If a bigger bench press is your goal there is a chance that at some point you will experience some type of elbow pain. This is usually brought on by the intensity, volume, or frequency at which you are bench pressing and most likely the combination of the three. What results is inflammation of the tendon near the olecranon. If left untreated the situation could become worse and result in tendinosis. When this problem comes about you have three options: You can take time off and let it recover, you can work through the pain, or you can find ways to work around the pain. Even though the smartest thing to do is take some time off, most people aren’t going to do this. Taking time off will reduce the stimulus to the area which will allow inflammation to subside and the area to heal.
Most people, including myself, are stubborn so if you refuse to take time off your next best option is working around the pain. This is what I did and I’m still making gains in my bench press while also reducing my elbow pain. The following are some of the ways I did that and I encourage you to implement them as well if you don't want to take the time off necessary to recover.
1. Take Out Elbow Dominant Accessory Work
Usually, what you’ll find, is that most elbow pain does not flare up during pressing exercises. Rather, the pain occurs during accessory movements that make the elbow the main point of action. Accessory movements such as triceps pushdowns, skull crushers, supine triceps extensions, and seated overhead triceps extensions should be avoided. These types of isolation exercises cause the elbows to take the brunt of the work and cause pain in already irritated elbows. Try substituting partial range of motion pressing movements, close grip pressing movements, or a combination of the two for your accessory movements. Things like a 4 board close grip bench press is a great one. As well as partial pushups to sandbags or to a 4-5 board works great as well. You’ll find that these movements will cause less elbow pain because the work is no longer completely centered on the elbow but spread out to the chest and shoulders.
[vsw id="8PA58Ds6duo&list=UUKSYQ75Buogznl62rdbks2Q&index=2&feature=plcp" source="youtube" width="425" height="344" autoplay="no"]
2. Hammer Your SMR and Mobility Work
When engaging in a high volume/high intensity press focused program, it is likely some serious adhesions will build up in your triceps. And if you’re not staying up on your shoulder and t-spine mobility, the problem in your elbows may get even worse. I learned these two lessons the hard way. Since making them a priority my elbows have gotten better, I still have a long way to go. Spend 5 minutes on your days off and after hard sessions rolling your triceps and anywhere around the problem area. I’ve found using the cardboard cylinder from the plastic wrap that athletic trainers use to wrap ice bags with to be an awesome tool to use for SMR. It’s small which allows for a little more concentrated roll and much more handy and easier to manipulate than an actual foam roller.
As I stated before it’s important to hammer your shoulder and t-spine mobility as well. Just like knee problems arise from poor hip mobility the same goes for elbow problems and lack of shoulder mobility. Poor shoulder mobility basically impedes the ability of the triceps to aid in shoulder extension and when coupled with excessive elbow dominant exercises the end result is inflammation and pain. Take time to work in some static stretching drills for your pecs, lats and rotator cuff. I found that working this in after your SMR sessions yields the best results. Be sure to also incorporate some t-spine extensions either on the wall or on a foam roller throughout your sessions as well in order to get that upper back a little more mobile. Try to accumulate around 5 minutes of total work for your shoulders and t-spine.
3. Use a Thorough Warm-up/Prehab work
In order to help work around your elbow pain, it’s imperative that the area have a good amount of blood flow before you slam it with heavy doubles or high volume accessory work. The same goes for your warm up and prehab work as it does for your accessory work; lay off the movements that isolate your elbow. Use full range pushups, band pullaparts, facepulls, rotator cuff circuits, etc. to warm up before pressing. These will not only get your elbows ready but also your upper back, shoulders and chest as well. One exercise I just recently started using that is a variation of an exercise I learned from Mark Bell is what I nicknamed the Elbow TKE. I’ve been using this almost every day for the past couple of weeks to warm up my elbows for not only pressing movements but for squatting, deadlifting, and just general blood flow work as well. This is an awesome exercise to isolate your triceps without putting direct pressure on the elbow.
[vsw id="OnqWOWq0WVA&feature=related" source="youtube" width="425" height="344" autoplay="no"]
Keep on pressing my friends.
SAPT Exercise of the Week: Pushup Bodysaw Series
Here's a fantastic pushup variation I've found myself using with increasing frequency in my own training, along with programming them for some of the athletes in SAPT who have progressed appropriately.
What is it: Pushup Bodysaw Series. You can choose one three options shown in the video below:
Why I like it
Ummm, 'cuz it looks completely awesome! While I have yet to confirm this, I'm pretty sure Batman used these in his preparation to battle it out with Bane, the verifiable genius and muscle-bound brawler we'll experience during The Dark Knight Rises this Summer. (Yes I'll be seeing this opening night in IMAX)
Sorry, I got distracted....let me try this again.
Why I like the pushup bodysaw series
- You can do it virtually anywhere, without needing any crazy special equipment!
- It's a pushup variation. When it comes to "bang for your buck" exercises, few can top the pushup. I rank them right up there with deadlifts, chinups, and farmers carries for best return for your investment.
- It really increases the difficulty of the standard pushup by adding a dynamic component for the hands+scapula, providing an "anti-extension" challenge for the core, and decreasing the mechanical advantage via base of support shifting.
- You get a bit of scapular rotation work with the arm that's sliding up.
- The spiderman bodysaw (third in the series) increases the difficulty even further by taking away a base of support, along with giving you a bit of hip mobility as your leg goes into flexion and abduction at the top.
How to do it
- Grab one or two furniture sliders, these are crazy cheap and can be found at nearly any hardware or Bed, Bath, & Beyond-related store. If you insist, you can omit the sliders and simply use a towels (if you have a slick surface to use, like a wood or tile floor), or paper plates on carpet.
- Squeeze your glutes HARD (as if you could crack a walnut between your buttcheeks) and brace your abdominals as if the world is about to end. This will keep your hips and low back from "sagging" throughout the movement.
- Keep your neck in neutral by resisting the urge to let your head drop, "reaching" for the ground. This is probably the most common error I see people unaware of.
- Perform 4-10 reps per side.
- Pretty self-explanatory from here, just watch the video and try to avoid falling on your face.
Depending on where you're at, I would NOT begin by trying to slide all the way out. Stay within a range of motion that you can keep good form in, and progress from there (most of you will have to watch out for the hips sagging to the ground). If you haven't already, master the perfect pushup before moving to one of the pushup bodysaw variations.


