15 Variations of the Side Plank
The side plank is one of those exercises I find myself frequently tossing out of my quiver of training options, only to find myself continually coming back to it saying, "Why did I stop doing these again?" Or, "Tell me why I stopped giving these to my athletes?" It's a fantastic exercise that I feel should be imperative in every single beginner program - to teach them core stability, resisting lateral flexion, etc. - but can also be extremely useful as a warm-up or "filler" exercise for more advanced trainees.
Bottom Line: You are never either too novice or too advanced for the side plank, it's just a matter of finding the right fit for you personally.
Here are 15 variations of the good ol' fashioned side plank, be you a beginner or an advanced trainee.
Oh, and don't be a fool like I was during these photos with the extremely grody head positioning. Apparently I didn't want to look Tadashi in the eye as he snapped these; either that, or I felt like looking off into the horizon. The chin should be neutral, or "packed." Geeze, why did that guy in the red demo these, anyway?
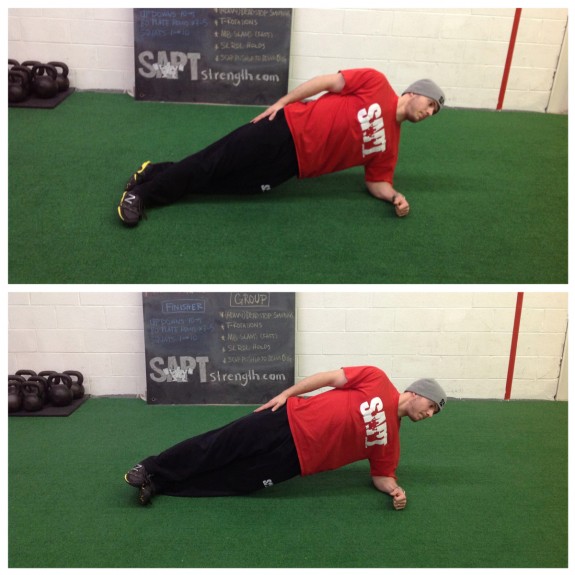
Level 1: Short Lever and Torso-Elevated
I personally find the knees bent, or "short lever," variation MUCH better suited for those who are new to training and/or are dealing with low back pain. For whatever it's worth, I've found that, in some cases, elevating the torso even seems to make it harder then doing it on the flat ground.
If I'm working with someone on their first day, and I'm doubtful that they can do a normal side plank without collapsing in the first 5 seconds, I'll usually go with the short-lever first to set them up for success, and then progress accordingly if they feel good.
Level 2: Staggered-Feet and Standard
(Note: Staggering the feet is typically easier than stacking them)
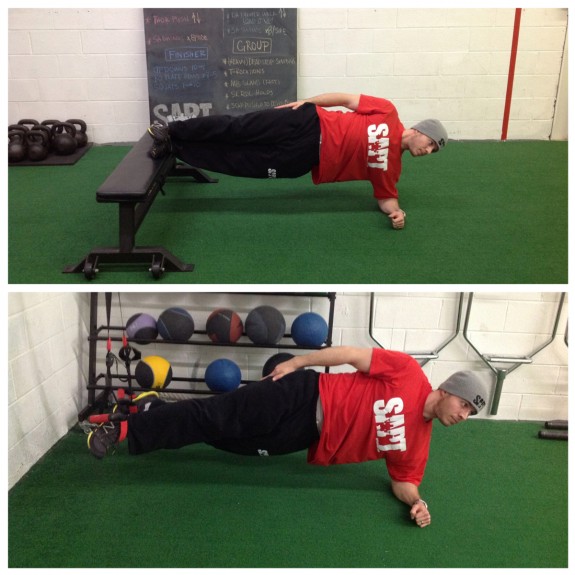
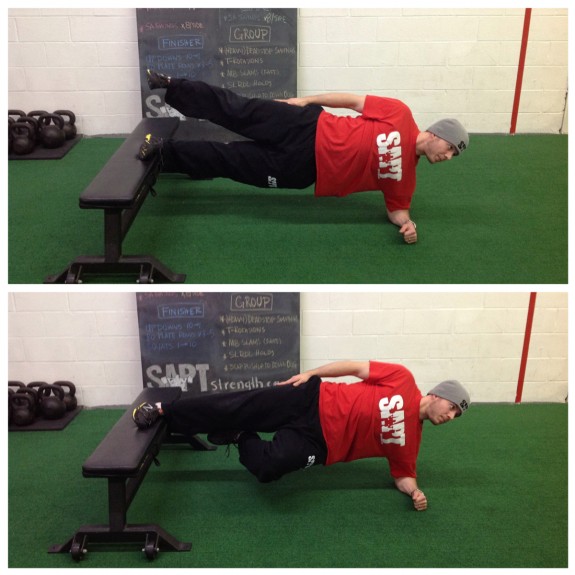
Level 3a: Feet-Elevated Side Plank, Stable Surface or Suspension Straps
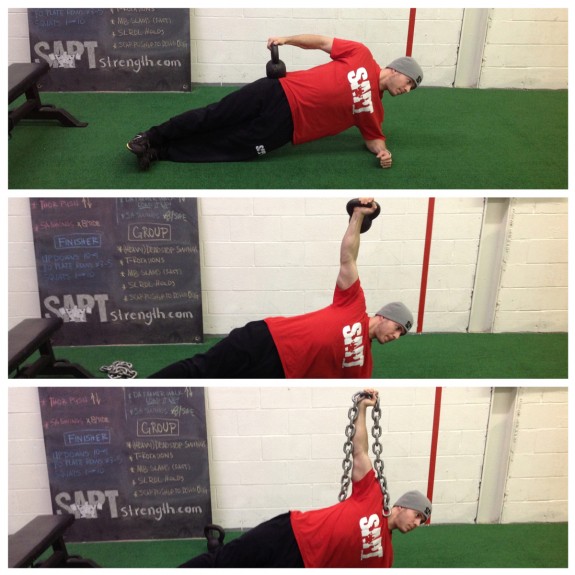
Level 3b: Weighted Side Plank w/Weight On Hips, or Weight Held Overhead)
You can certainly use a dumbbell (or even a weight plate) instead of a kettlebell on the hips, but I find the kettlebell feels much more natural when holding it overhead. The overhead chain hold adds a nice stability challenge, since it will want to sway on you.
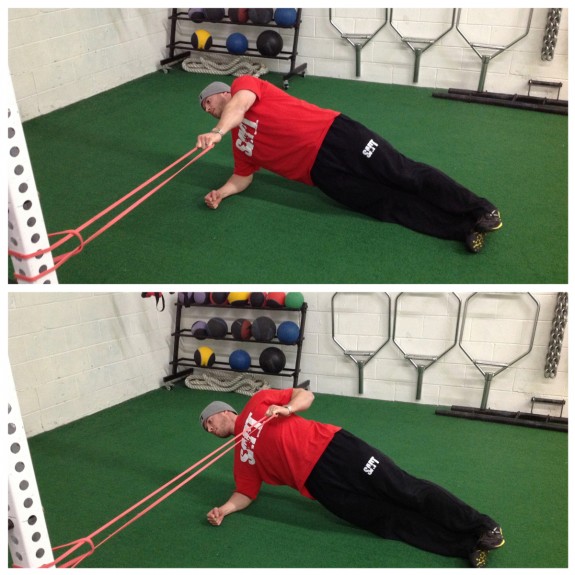
Level 4: Side Plank + Band (or Cable) Row
This is one of those "fun" ones as it's less boring than remaining static, but it also provides all the benefits of horizontal pulling.
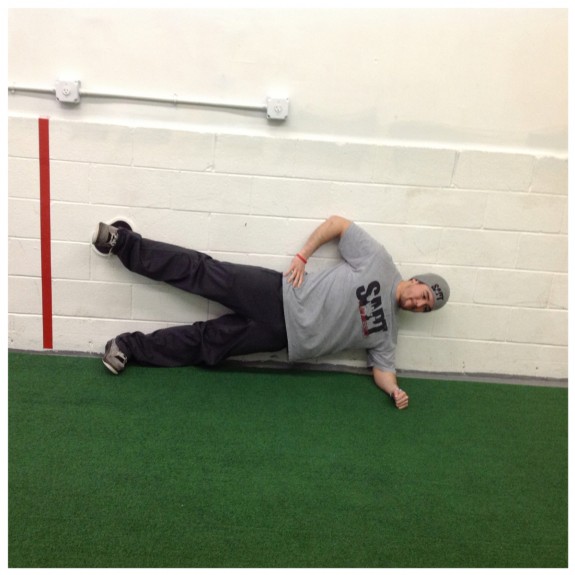
Level 5: Side Plank w/Wall Slide
This variation is downright miserable, which is why I had Tadashi demo it for me. To keep yourself honest, place a furniture slider under your heel. Start with the feet stacked, then slide your heel up the wall, trying your best not to make a pain face as your glutes light on fire.
Level 6: Weighted + Feet-Elevated
Level 7: Single-leg + Feet-Elevated with Top Leg Support, Single-Leg +Feet-Elevated with Bottom Leg Support
These are pretty advanced, and definitely shouldn't be just handed out to anyone and everyone. When the bottom leg is supporting it will fry the abductors of that leg (assuming you are actually keeping your hips up), and when the top leg is supporting, your adductors will be screaming for mercy.
I generally like prescribe two to three sets of :10-:40 (depending) per side. If you can't hold a variation for at least :10 then it's probably too advanced, and I personally feel that anything longer than :40 per side is overkill for most. With the band row and wall slide, I recommend sets of 8-12/side reps for the row, and 5-8/side for the wall slide.


