Press Around the Pain
If a bigger bench press is your goal there is a chance that at some point you will experience some type of elbow pain. This is usually brought on by the intensity, volume, or frequency at which you are bench pressing and most likely the combination of the three. What results is inflammation of the tendon near the olecranon. If left untreated the situation could become worse and result in tendinosis. When this problem comes about you have three options: You can take time off and let it recover, you can work through the pain, or you can find ways to work around the pain. Even though the smartest thing to do is take some time off, most people aren’t going to do this. Taking time off will reduce the stimulus to the area which will allow inflammation to subside and the area to heal.
Most people, including myself, are stubborn so if you refuse to take time off your next best option is working around the pain. This is what I did and I’m still making gains in my bench press while also reducing my elbow pain. The following are some of the ways I did that and I encourage you to implement them as well if you don't want to take the time off necessary to recover.
1. Take Out Elbow Dominant Accessory Work
Usually, what you’ll find, is that most elbow pain does not flare up during pressing exercises. Rather, the pain occurs during accessory movements that make the elbow the main point of action. Accessory movements such as triceps pushdowns, skull crushers, supine triceps extensions, and seated overhead triceps extensions should be avoided. These types of isolation exercises cause the elbows to take the brunt of the work and cause pain in already irritated elbows. Try substituting partial range of motion pressing movements, close grip pressing movements, or a combination of the two for your accessory movements. Things like a 4 board close grip bench press is a great one. As well as partial pushups to sandbags or to a 4-5 board works great as well. You’ll find that these movements will cause less elbow pain because the work is no longer completely centered on the elbow but spread out to the chest and shoulders.
[vsw id="8PA58Ds6duo&list=UUKSYQ75Buogznl62rdbks2Q&index=2&feature=plcp" source="youtube" width="425" height="344" autoplay="no"]
2. Hammer Your SMR and Mobility Work
When engaging in a high volume/high intensity press focused program, it is likely some serious adhesions will build up in your triceps. And if you’re not staying up on your shoulder and t-spine mobility, the problem in your elbows may get even worse. I learned these two lessons the hard way. Since making them a priority my elbows have gotten better, I still have a long way to go. Spend 5 minutes on your days off and after hard sessions rolling your triceps and anywhere around the problem area. I’ve found using the cardboard cylinder from the plastic wrap that athletic trainers use to wrap ice bags with to be an awesome tool to use for SMR. It’s small which allows for a little more concentrated roll and much more handy and easier to manipulate than an actual foam roller.
As I stated before it’s important to hammer your shoulder and t-spine mobility as well. Just like knee problems arise from poor hip mobility the same goes for elbow problems and lack of shoulder mobility. Poor shoulder mobility basically impedes the ability of the triceps to aid in shoulder extension and when coupled with excessive elbow dominant exercises the end result is inflammation and pain. Take time to work in some static stretching drills for your pecs, lats and rotator cuff. I found that working this in after your SMR sessions yields the best results. Be sure to also incorporate some t-spine extensions either on the wall or on a foam roller throughout your sessions as well in order to get that upper back a little more mobile. Try to accumulate around 5 minutes of total work for your shoulders and t-spine.
3. Use a Thorough Warm-up/Prehab work
In order to help work around your elbow pain, it’s imperative that the area have a good amount of blood flow before you slam it with heavy doubles or high volume accessory work. The same goes for your warm up and prehab work as it does for your accessory work; lay off the movements that isolate your elbow. Use full range pushups, band pullaparts, facepulls, rotator cuff circuits, etc. to warm up before pressing. These will not only get your elbows ready but also your upper back, shoulders and chest as well. One exercise I just recently started using that is a variation of an exercise I learned from Mark Bell is what I nicknamed the Elbow TKE. I’ve been using this almost every day for the past couple of weeks to warm up my elbows for not only pressing movements but for squatting, deadlifting, and just general blood flow work as well. This is an awesome exercise to isolate your triceps without putting direct pressure on the elbow.
[vsw id="OnqWOWq0WVA&feature=related" source="youtube" width="425" height="344" autoplay="no"]
Keep on pressing my friends.
Quick Thought on Early Sport Specialization
(Note: If you're wondering what "early sport specialization" refers to, check out THIS great article by Max Prokopy) Correct me if I'm wrong, but seemingly everything is becoming increasingly competitive these days:
- Number of high school clubs (sport and academic) you can be a part of
- College admission requirements
- Grad school admissions
- Climbing the "corporate" ladder in the business realm
- Racing the person next to you in the self-checkout line of a grocery store (yes, I did this yesterday)
- How quickly one can reach level 80 in World of Warcraft
And the list goes on.
Along with all this has inevitably surfaced the incessant push for children to excel in sport as quickly as possible. This will help little Johnny or Sally become the most distinguished child in the neighborhood, and increase the likelihood of receiving a scholarship to a DI or DII university.
Given that SAPT is a facility that strength trains middle and high school athletes , I'm frequently approached by well-intentioned parents informing me that their 12-year old child only needs to be doing drills that are, quote, "specific," to baseball, or soccer, or volleyball, or whatever (in fact this concept is quite similar to the vertical jump issue I discussed on Friday).
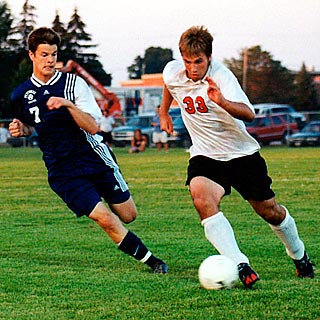 Let me cut to the chase here. As Sarah has mentioned before on this site: Americans have royally screwed up the process of athletic development, in adolescents and adults alike. Along a similar vein, Pavel Tsatsouline (former Soviet Special Forces training instructor) tells us:
"Soviet sport science has made it clear: Premature overspecialization delivers a quick increase in performance followed by stagnation. Extensive research and experimentation have demonstarted that athletic specialization must be supported by all-around preparation. That means GPP."
What does this mean? BEFORE an athlete (especially a young one) engages in true, sport-specific training, they are best served working on 'general physical preparedness,' or GPP. This will actually HELP the athlete excel in future sporting events by accumulating a wide range of fitness components, carrying over to a broad scope of tasks.
Given that few seem to understand what 'GPP' actually is, I'll resort to Professor Nikolay Ozolin on this one. Ozolin is one of the founders of Soviet sport science, having mentored Yuri Verkhoshanksy (the "Father of Plyometrics") and is a distinguished athlete and coach of the USSR himself. He defines GPP as:
"GPP contains the idea of all around physical development. Which is why the qualities developed by GPP may be called general as they express the ability of the organism and its psychological sphere to perform any physical work more or less successfully. Hence general endurance, general strength, general joint mobility, general coordination, general psychological preparedness."
At SAPT, when we train our young athletes (even high school athletes, depending on their stage or emotional+physical development) we help them develop a wide range of physical attributes that will help them not only in their chosen sport, but also in countless other physical endeavors. Then, when they are actually ready for true sport specific training, they'll be way better off than if they specialized too soon. And yes: SAPT does of course take into consideration the sport the athlete plays and adjusts the program accordingly, but not at the expense of neglecting other physical attributes.
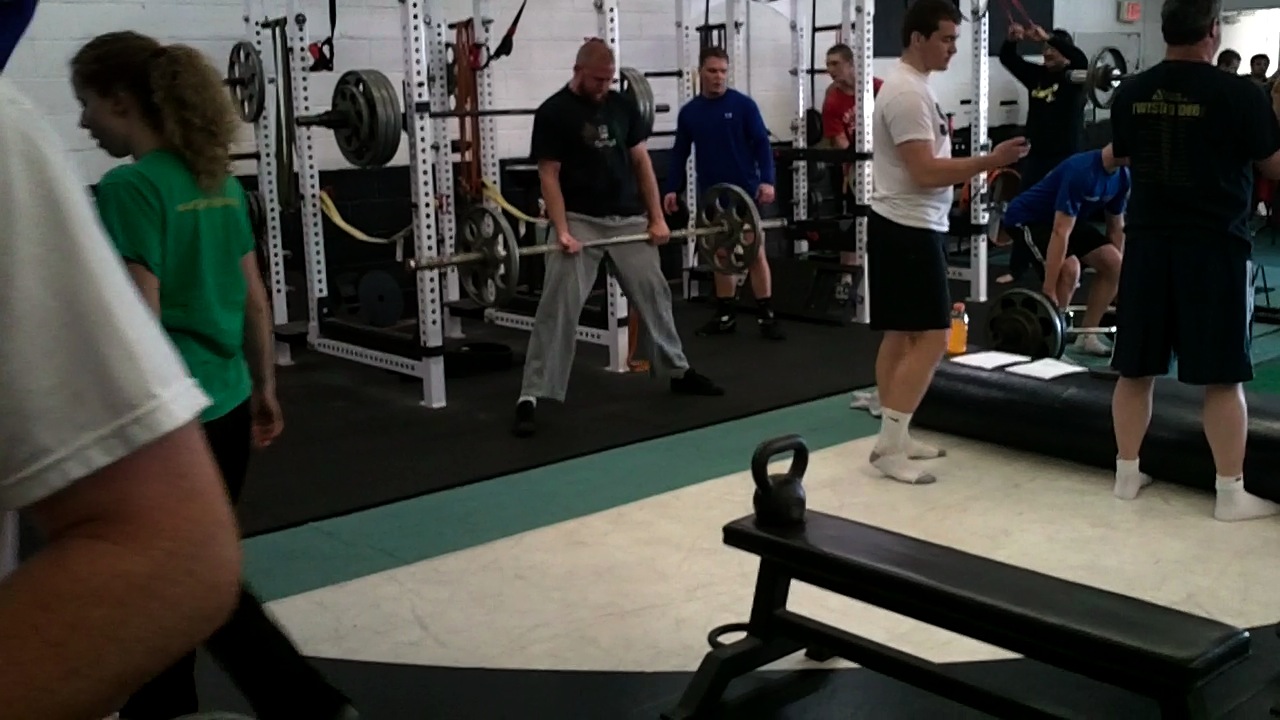 In closing: Encourage the young athlete (be them your child or not) to immerse themselves to a wide range of sports and physical skills. While it may appear counterintuitive, this will actually:
- Prevent early stagnation and help them maximally blossom when it comes time for true sport-specific training
- Potentially expose them to a sport they enjoy more or are more adept at than the sport they (or their parent!) thinks they were initially meant to specialize in
- Reduce the risk of overuse injuries (ex. it's scary how many adolescent baseball players are developing elbow+shoulder dysfunction due to early sport specialization)
- Help the athlete enjoy training for the sake of training. Then, even after their competitive athletic career is over, they can still engage in physical activity without a negative association
- Give the child more time for things he/she actually enjoys! Be it fishing, ice skating, doing schoolwork, playing backyard football, whatever.
Vertical Jump Initial Testing. Is it Really the Bees Knees?
Given that we train a lot of high school volleyball players at SAPT, I'm inevitably faced - on a weekly basis - with two questions that continually pop up from the players, or, more commonly, the parents of the girls: 1) Why aren't you testing my/my daughter's vertical jump on Day 1 as a baseline measurement?
2) Why aren't you doing a lot of plyometric drills with me/my daughter?
 (Note: Although all this is being discussed with regards to volleyball, many of the same principles can be applied to other sports when it comes to verticals and improving change of direction speed)
While the answers to these questions could easily be an entire article series on their own, I'll do my best to summarize my points here.
1) The vertical jump simply isn't an appropriate test for most (but not all) high school athletes. Not only are there other methods of assessing one's athletic potential, but continually making an athlete jump up and down with maximal effort can be dangerous. Let me briefly explain.
To put it simply: Many high school athletes lack the strength and neural control to execute a solid vertical jump. Just watch nearly any volleyball player do a standing vertical jump attempt on the vertec. However, instead of focusing on their torso, arms, and where their hand smacks the vanes, watch their knees during the countermovement phase of the jump (as they transition from moving down to moving up). What you'll see often resembles my replication in the video below:
May not have noticed that the first time you watched your kid jump, huh? Essentially the athlete is limiting how high they can jump by allowing "force leaks," to take place, in which they end up in sub-par biomechanical position for force production. Not only that, but it is dangerous for their knee health (along with other passive restraints in the lower extremity) to continue practicing like this.
While there are multiple root causes for this phenomenon, a good strength coach can often add a few inches to the athlete's vertical jump by merely teaching the athlete to keep themselves in powerful alignment during the countermovement phase. This involves much more than simply shouting at them to keep their knees out, BTW!
2. Plyometric drills are not a "one size fits all" approach. When you're administering individualized program design for each and every person in the room, as we do at SAPT for all our athletes, it's not a matter of just throwing a bunch of adolescent girls into the same cattle call drills.
Very precise decision making must be made in order to administer and match the exercise to the individual. In fact, any perceptive strength coach who's been in the industry has recognized by now that the more "advanced" and technical exercises (be it jump training, sprint training, medicine ball drills, olympic lifts etc.) will do NOTHING for the athlete unless he/she already possesses the necessary physical and technical preconditions for performing these drills!
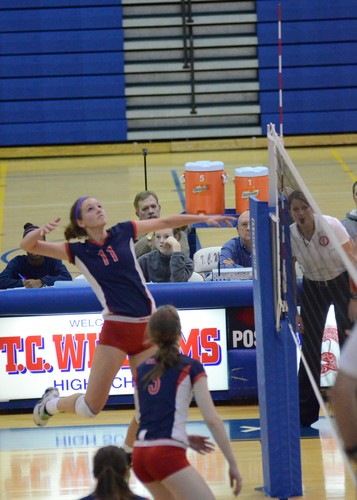
As a quick example, we run the strength and conditioning for the majority of the Woodson high school volleyball team (shown in the picture below), who recently won the the district title - and continued to the regional finals and state tournament - for the first time in school history. However, we still give each and every girl on that team an individualized training plan, and this includes their jumping and plyo drills (not the same thing, by the way).
Although all of them together make up a great team, some possess a greater degree of spatial awareness, neural coordination, and strength than others. It would do every individual a disservice to throw them all in the same drills together rather than match the appropriate drill to the person.
Bottom line: Some athletes will be ready for true plyo drills, others will be not-so-ready. A good coach will be able to evaluate the individual and determine where they need to begin along the plyo continuum (if at all).
So, What To Do?
While it is beyond the scope of this post to delve head-first into the myriad progressions/drills that are ideal and appropriate to use, I can at least say that 90% of the athletes I've worked with need to begin by with some variation of drill force reduction. Developing eccentric force absorption and muscle contraction will lay the framework for enhanced concentric strength potential.
What do I mean by this? You can't optimally PRODUCE force until you can adequately ABSORB force. In a vertical jump, the first move that takes place is the force reduction component (lowering yourself to jump) before the actual force production phase (extending body to accelerate upward) during which you leave the ground. The athlete will only be able to accelerate quickly if they are able to efficiently decelerate FIRST.
An example of a Level 1 force absorption drill would be an altitude drop with a stick landing, as shown in the video below. These will drill landing mechanics, develop yielding strength, and create a strong excitation of the CNS.
It looks simple and easy, yes, but you'd actually be surprised at how many top-notch athletes cannot land properly upon initial testing! It is not uncommon to see athletes having difficulty landing properly from a mere 5" box height.
From there, you'll want to progress to elasticity jumps with variable landings in order to the teach the athlete to use his/her active support structures (muscles and tendons) to minimize stress on the passive support structures (bones, ligaments, labrums, etc.).
This will help prepare them the more "real life " scenario come game day.
10 Rules to Keep Your Man Card
In the short time I’ve been a strength coach I’ve learned a number of lessons from mentors and co-workers.; one of those lessons being how to lose your “man card”. It’s important for us to understand that our man card is not a right, but a privilege. And trust me, if you’re not careful yours will get snatched away! Hence the reason for writing this post; follow these simple rules and I promise your man card won’t be going anywhere. Rule 1: Do not wear your clothes so tight that your girlfriend mistakes them for hers. Guys, there’s no excuse for this, either buy some bigger clothes or get bigger yourself.
Rule 2: Do not comment on how vascular another man is/don’t talk about how vascular you are. Is this something I really need to explain? Just don’t do it, it’s weird.
Rule 3: If your 140lbs soaking wet do not talk about wanting to gain mass and then complain about not wanting to lose your “six-pack”. MAN UP! Start pounding whole milk and peanut butter and start MOVING WEIGHT!
Rule 4: Do not lip sync to your awful music in the mirror at the gym in between sets with an angry look on your face. When I was in college I saw this entirely too often. Let’s keep that nonsense to yourself guy in the tiny Affliction t-shirt and Euro Puma shoes.
Rule 5: Bringing this back to the beginning, do not wear skinny jeans so tight that your girlfriend asks if she can borrow them. Much to my dismay, I feel like this happens more than it ought to. As a matter of fact just don’t wear skinny jeans.
Rule 6: Do not begin every sentence with the word “Bro”. Usually the sentence that follows goes something like; “Bro, can I get a spot on these Preacher Curls?”
Rule 7: Do not lift your shirt up to check out your abs in the mirror while at the gym. Put your shirt down and get back to your Smith Machine quarter squats.
Rule 8: Do not use a foam pad on the barbell when squatting or front squatting. Again, MAN UP! Get used to the bar, get some bigger shoulders, and get a bigger yoke!
Rule 9: Do not update your status on Facebook to “gettin’ swole at the gym”. Newsflash, no one cares that you’re at the gym. Unless your status is “attempting a 600lbs deadlift today” we don’t want to hear about your adventures on the elliptical machine.
Rule 10: Do not be the guy five years out of high school at the local gym telling everyone about the glory days and how “strong” you used to be. This is what I like to call the Uncle Rico syndrome. It’s over man, move on. And chances are you weren’t as strong as you thought you were.
[vsw id="Fmh5e-9bn8w&feature=youtu.be" source="youtube" width="425" height="344" autoplay="no"]
I know what you’re saying to yourself, “Ryan, you’ve never been guilty of any of these things?” And my answer would be nope, not a one. Come on, you seriously think I’d admit to any of these things? Anyway, be sure to follow these rules in order to keep doing those manly things we like to do such as, chopping wood, going on river boat gambling trips, making beef jerky, hunting bears with our bare hands, and wearing flannel.
The Yo-Yo Intermittent Recovery Test
Whether you call it the Beep, Bleep, or Yo-Yo Test all the names are all essentially synonymous. Jens Bangsbo, a Danish soccer physiologist, developed the beep test in the early 90’s. It is wildly popular with soccer teams worldwide, but has applications for all sports of intermittent nature.
 Who the Beep Test is for:
Well in this case I am referring to one specific variation of the beep test: the Yo-Yo Intermittent Recovery Test (Yo-Yo IR1 or 2). This assessment is fantastic for team sports of an intermittent nature (meaning there’s a lot of stop-and-go). I use it with my basketball, lacrosse, and soccer teams. It would also be appropriate for rugby.
***Disclaimer: This is a MAXIMAL effort test and should only be conducted with competitive athletes, not recreational athletes. There is a high level of fitness needed to successfully complete testing.
Why this test is so great:
- It is SUPER easy to implement in a team environment! You don’t need any special equipment; just some cones, measuring tape, whistle, and an app that plays the test version you want (the one I use cost about $3).
- It allows a coach to know an athlete’s VO2max for comparison and progress tracking purposes without having to use any fancy-schmancy equipment.
- The Intermittent Beep Test is a fairly sport-specific test for the team sports I listed above. It accounts for the frequent sprints, cuts, and walking associated with such sports and allows us coaches to apply a structure for analysis. This test goes light-years beyond simply running the mile in terms of the relevance of information that can be extracted.

Setup & Protocol:
- Create lanes for each athlete to run within – a lane is comprised of 3 cones. From where you place cone 1, measure out 5 meters and drop the second cone, from cone 2, measure out 20 meters and drop the third cone. Repeat this process for the number of lanes you need.

- Be certain to go over the rules of the Beep Test thoroughly with the athletes ahead of time. The speed increases as the test progresses and sometimes that’s hard for them to grasp. I usually let the group do a few passes as practice to remember what the test feels and sounds like.
- Start the test! If you are using this with a large team, you’ll want to divide the group in half and run it in two flights. This way, the athletes can partner up and the non-running athlete can count the total number of sprints for the runner.
- Two “misses” end the test. Record the total number of sprints.
***The purpose of reviewing test structure is simply to give you an idea of how the Beep Test is conducted. Consult formal instructions that come with the recording/app for more detailed information.
Interpretation:
Once you’ve recorded the results, now you want to know what it means! Simply plug your results into one of these two formulas to get the VO2max estimation:
Yo-Yo IR1 test:VO2max (mL/min/kg) = IR1 distance (m) × 0.0084 + 36.4
Yo-Yo IR2 test: VO2max (mL/min/kg) = IR2 distance (m) × 0.0136 + 45.3
Now that you know where your athletes' VO2max scores fall, you can begin to track and compare across other sporting platforms and look vertically within your sport at different levels to see where your athletes fall.
 As a side note, I think this is the first post I've gotten up on-time in about a month (10am is the soft-deadline). I've already patted myself on the back.
Which mass-gaining method is "best"?
After dragging my brain through 41 pages of research on "The Influence of Frequency, Intensity, Volume and Mode of Strength Training on Whole Muscle Cross-Sectional Area in Humans" guess what the conclusion was on an extensive study designed to figure out the best way/combination of ways to increase muscle mass? Essentially, that all variables are valuable and there is NO ONE SINGLE MAGIC BULLET.
Sometimes - okay, a lot of times - research totally cracks me up. I think I've stated this before. This paper was about 10x longer than most with extreme detail and for what... to confirm something that any experienced strength coach knows:
Regarding progression, we recommend low volumes (e.g. 1–2 sets) in the initial stages of training, when performing eccentric-muscle actions, because low volumes have been shown to be sufficient to induce hypertrophy in the early stages of training and because exercise adherence may be improved if the workout is relatively brief. Also, avoiding unnecessary damage may allow hypertrophy to take place earlier. As the individual adapts to the stimulus of strength training, the overall volume and/or intensity may have to be gradually increased to result in continued physiological adaptations and other strategies (e.g, periodisation) can also be introduced if even further progress is desired.
So, through actual published research (and not the usual anecdotal evidence), it is confirmed that the best policy when progressing an individual for anything - in this case hypertrophy - is always found in moderation.
The next time you're considering ordering any number of TV products promising to solve all your problems or thinking about signing your kid up for training that "guarantees" quick results, I ask that you keep in mind some solid research and accept that anything worthwhile in life takes time, hard work, and guidance.


